Hello to my beloved maniacs of a perfect manicure! I devote the post to the ombre nails guidelines. It’s an easy way to get a trendy and unique manicure. I love nail polish layering and know a few simple tricks for ombre nails. Fancy knowing, too? :):)
Ombre layering is a thing now because it brings something new to the classic manicure and doesn’t require much experience or skills.
What do ombre nails look like?
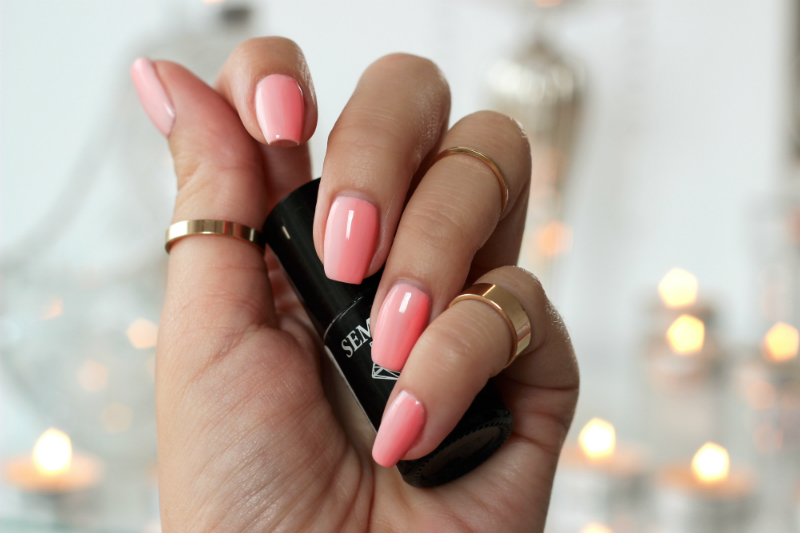
Minimalist. To me, it’s a brilliant way to break the classic manicure trends. Ombre combines two or more colors which in a way melt together, creating a gradient effect on nail plates. Thanks to the layering, the lines aren’t visible.
You get a stunning effect if you use colors that aren’t too contrasting. It’s a matter of a minimal feeling of aesthetics. Ombre nails can look mind-blowing.
I usually see girls who have ombre done across the nail plate e.g. milk color by the cuticles and beautiful brown at the ends. Still, there isn’t just one rule saying what ombre nails should look like.
Remember that:
- horizontal ombre makes nails look longer
- vertical ombre makes them look shorter
Benefit: if you want ombre nails, a beautician’s assistance isn’t a must
I’ve been doing my nails for a few years now. It’s getting easier thanks to some manicure start packs. Ombre works even if you prefer classic manicure and aren’t into gel nails. Knowing a few simple tricks, ombre nails are really easy to do.
Girls, let’s do it!
What are ombre nails essentials?
Before applying the nail polish, prepare everything you need for ombre nails. Accessories depend on the method you choose. I describe them below as alternatives. A must-have set includes:
- at least two nail enamels in different colors (preferably, not contrasting),
- a sponge or a flat brush,
- nail polish remover (from my experience – a remover pen is the best),
- a cuticle moisturising oil or cream,
- a shine-intensifying, smoothing and fixing top coat.
STEP BY STEP OMBRE NAILS
Have you got everything? Let’s move on to the procedure!
How to do ombre nails? Prepare your nails like you do in a classic manicure. Use a cuticle pusher and give your nails a desired length and shape. Polish them with a buffer. It takes a few minutes if you’re used to the mani routine.
Before applying the colors – a game-changing tip!
Apply some oil or cream to cuticles and degrease the nail plates with a cleaner (an acetone-free remover or alcohol-infused product). In this way, your mani will be longer-lasting. What’s more, it will be easier to remove the excess of nail polish (it’s hard to do ombre nails without smudging the fingers).
Firstly, apply the base color to the entire nail plate. It’s usually the lighter shade which evens out the plate. The first coat is one-color.
How to do ombre nails step by step?
Method 1 – ombre with a sponge
Take a small piece of a soft sponge (a rough and hard one won’t give the desired effect). Tip: at first, gently soak the sponge in cold water so it absorbs less enamel. Paint two stripes of different enamels on the sponge (next to each other) – the base color and the other one. Then dub the sponge onto the nails – do it gently and gradually to mix the shades. Don’t rub or press to avoid smudges. You’re going to get the hang of it after a few times.
Method 2 – ombre with a brush
If you can’t handle the sponge, use an alternative technique. How to do ombre nails with a brush? Apply both colors next to each other directly to your nails. Next, take a brush and blend the two colors where they meet. Gently ‘sweep’ the brush over the nails. Obviously you need to give it a try a few times to do it right.
Last but not least: After the nail polish dries off, clean up all the excess with a remover. Next, secure the ombre, applying a top coat. Complete!

Leave a Reply